Food Gold: Press Coffee
Posted on Mar 10th, 2010 in Food Gold by Mr. Goldbar
This week at Food Gold I’m gonna teach you a thing or two about making coffee. I really DO mean just a thing or two, because there are more sides to this topic than Gucci mixtape cuts and AVH aliases. For the sake of this post we’re talking about the 4-minute French Press method. These steps may seem a little nit-picky, even obsessive, but all I’m saying is that if you follow these instructions your coffee quality of life will be boosted, plain and simple. Your homemade brew will be a joy to drink and not the first chore of the day. And the whole process only takes about 10 minutes! Click below to learn all about it.
I thought I was just your average 1 or 2 cup a day coffee drinker until last May when five of my friends bought me coffee related paraphernalia for my birthday. This was one of those moments in life when your loved ones show you the truth. I would call it an intervention If it hadn’t been so enabling. My relationship with coffee has become almost ritualistic; the process of making it is nearly as important as the drinking. I must ask you politely to suspend your disbelief and trust that all the steps described below are necessary and not the misguided fanatics of a zealous freak. The whole process has been thoroughly tested and optimized. You can trust me, I mix things for a living and have a bachelors of science from an elite university.
What you need:
• Coffee Beans (roasted less than a month ago)
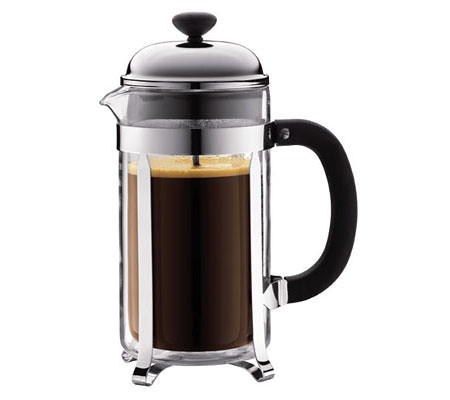
• French Press coffee pot (about $20)
• Burr Coffee grinder (Yikes! $70! or see alternative below…)
• Tea Kettle
• Half-and-Half
1. Grind the beans just before brewing using a burr grinder on the coarsest setting or use coarse pre-ground beans.
2. Bring water to a boil in the kettle and let it sit with the top off for about a minute to cool down. Pour some of the hot water into your coffee cup to heat it up.
3. Add the ground beans to the press pot and add 6oz of water for each 2 tablespoons of grounds. Pour the water over the grounds in a circular motion to cover them but don’t stir! Let the grounds and water mingle and bloom for a full minute, then stir the grounds into the water, cover with the press top and brew for an additional 3 minutes.
4. After 4 minutes of total brewing, slowly push down the press top, forcing the grounds to the bottom, and pour the coffee into your cup or thermos. Add some half-and-half (don’t water your coffee down with dilute dairy!) and enjoy.
Now the in depth analysis and explanation for all nerds and inquisitive types:
The Bean: It doesn’t really matter what kind you use as long as you start with beans that have been roasted pretty recently (like most things relating to food, the fresher the better!) This method brings the most out of any bean, so I prefer to brew lighter roasts to not end up with something too overpowering.
The Grind: Shout to DJ Skribble!! I swear by grinding my beans immediately before brewing using a burr grinder. Burr grinders have two interlocking teeth that allow for evenly ground coffee in a range of sizes from the fine particles used for espresso to the coarser grind we want for French Press. The problem is that the cheapest burr grinder runs about $70 bucks. With press coffee, it’s crucial to get an even coarse grind; finely ground beans will lead to bitter coffee full of little grinds that find their way through your filter. If you really like coffee, a burr grinder is a sound investment (you’ll also need it when you hit your espresso phase!) but If you can’t spring for one (or all you have is a blade grinder), you should get your coffee ground coarse at purchase and store in an airtight container. This is a bit controversial, but I think having a coarse and even grind is more important then grinding right before brewing. Now I can’t stop thinking of “Freak Me” and the 6th grade! Spring is almost here!!
The Water: Water temperature is key when making a pot of French Press. Most sources advise to have the water between 195-205˚ Fahrenheit, which is slightly below boiling. Too hot and you get bitter coffee, too cold and it will be weak. I may care about detail, but I can’t be measuring my water with a thermometer each morning, it’s just too similar to my former career as a lab technician. My method is to heat the kettle with the top off until I see the first bubble boil up from the bottom. Alternatively, you can bring the water to a full boil and let it sit for a minute to cool down as I described above. I highly encourage pre-heating your cup with some left over boiled water, especially during cold months. You don’t want your black gold to go all Galt MacDermot.
The Brew: Above I outlined the ratio of 2 tablespoons of grounds for every 6 ozs of water. When I make a cup just for myself, I’ll make a 12 oz pot using 4 tablespoons. Depending on how freshly roasted/ground your beans are, you’ll witness a blooming effect as the grounds expand and release C02 after the water is added. When you see the bloom you know you’re rocking with the best.
Clearly, this method is a far cry from setting your automatic drip pot the night before to wake and deliver you fresh coffee before your brain has officially turned on (a perfectly acceptable method I might add!) but I’m convinced the extra effort is worth it. If you’re curious but don’t want to make the investment up front for a bunch of coffee gadgets, seek out a coffee shop that serves french press coffee instead of drip. This method has really caught on in the past few years, and chances are the legit cafe in your area can hook you up.
Fork the world don’t ask me for sips! Every cup you brew you got ta work haaaard for it. (R.I.P. B.I.G.)
-Sammy